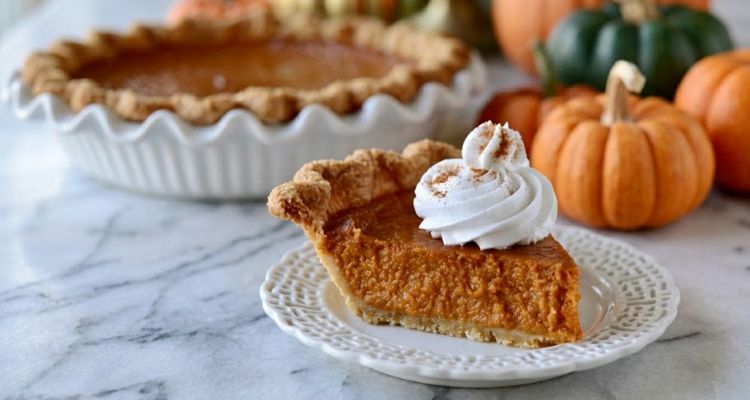
Pioneer Woman pumpkin pie from The Pioneer Woman site fills a par-baked crust with a custard of canned pumpkin, heavy cream, two sugars, and pumpkin pie spice. And the pie serves 8 to 10 at approximately 350 calories per slice in about 2 hours and 50 minutes, since the crust chills for an hour before baking even begins.
Where most pumpkin pie recipes use evaporated milk in the filling, this version calls for heavy whipping cream instead. So the custard sets richer and silkier, because the higher fat content gives the filling more body than the thinner canned milk does.
Par-baking the crust with pie weights first and then empty is the two-stage step that keeps the bottom crisp under the wet filling. And if you pour the custard into a raw shell, the bottom never fully bakes and you end up with a soggy crust that sticks to the plate when sliced.
Source: The Pioneer Woman (thepioneerwoman.com)
Pioneer Woman Pumpkin Pie
Course: DessertsCuisine: AmericanDifficulty: Easy8
servings30
minutes1
hour20
minutes350
kcalA chilled pie crust par-bakes with weights at 400°F, then bakes empty until the bottom dries before the oven drops to 350°F. Then whisked pumpkin, heavy cream, sugars, spice, vanilla, eggs, and an extra yolk pour in and bake until the edges set and the center barely jiggles.
Ingredients
- For the crust:
1 unbaked pie crust (store-bought or homemade)
- For the filling:
1 (15-oz.) can pumpkin puree
1 1/4 cups heavy whipping cream
1/2 cup granulated sugar
1/4 cup packed light brown sugar
2 teaspoons pumpkin pie spice
1 teaspoon vanilla extract
1/2 teaspoon kosher salt
2 large eggs plus 1 large egg yolk
- For serving:
Whipped cream
Directions
- Roll and fit the crust: On a floured surface, roll the dough into a 13-inch round and transfer to a 9-inch pie plate at least 1 1/2 inches deep.
- Crimp and dock: Then tuck the edges under, crimp them, and prick the surface all over with a fork.
- Chill the crust: Once crimped, refrigerate for 60 minutes or freeze for 30 minutes until firm.
- Preheat for par-baking: Then heat the oven to 400°F.
- Add the weights: Once hot, line the inside of the crust with parchment and fill to the top with pie weights or dried beans.
- First par-bake: Then bake for 13 to 15 minutes until the edges look dry and just begin to color.
- Remove the weights: Once the edges set, carefully lift out the parchment and weights.
- Second par-bake: Then return the empty crust to the oven for 4 to 6 minutes until the bottom appears dry.
- Reduce the oven: Once the crust is par-baked, lower the temperature to 350°F.
- Make the filling: While the oven adjusts, whisk the pumpkin, cream, and both sugars in a bowl.
- Add the remaining ingredients: Then whisk in the pumpkin pie spice, vanilla, salt, eggs, and egg yolk until smooth.
- Pour and bake: Once combined, pour the filling into the par-baked crust, set on a baking sheet, and bake 55 to 60 minutes.
- Check the jiggle: When the edges are set and the center jiggles just slightly, remove from the oven.
- Cool and serve: Then cool completely on a wire rack, and serve with whipped cream or refrigerate.
FAQs
Why does this recipe par-bake the crust in two stages?
The first stage with pie weights prevents the bottom from puffing up, and the second stage without weights dries the bottom so it does not turn soggy under the wet filling. And skipping either stage means the custard sits on underbaked dough for an hour, which guarantees a soft, sticky bottom.
So do not rush the par-bake by combining both stages, because the weights trap moisture against the dough surface. And removing them for the final 4 to 6 minutes lets that moisture escape before the filling goes in.
How do I know when the filling is done?
The source page says to give the pie plate a gentle shake and look for set, puffed edges with a slight jiggle in the center. And that wobble firms up as the pie cools on the rack, so pulling it while the center still moves is the key to a crack-free surface.
But if the entire surface looks solid and puffy, the pie has already overbaked and cracks will form as it cools. Since the filling continues to set for another 30 minutes after leaving the oven, trust the jiggle and resist the urge to wait for a completely firm center.
Can I make this pie ahead for Thanksgiving?
The source page says you can bake it 1 to 2 days ahead, wrap tightly in plastic, and refrigerate. And leftover pie stays good for up to 4 days in the fridge, so it is one of the easiest holiday desserts to prep early.
But make the whipped cream right before serving, because it deflates the longer it sits. And for a full Pioneer Woman Thanksgiving dessert spread, the pioneer woman pecan pie pairs well alongside since both pies can bake in the same oven at 350°F.
What does the extra egg yolk do in the filling?
The additional yolk adds fat and emulsifying power that helps the custard set firmer and smoother than using whole eggs alone. And it gives the filling a richer, more golden color that looks deeper than the pale orange of standard pumpkin pie.
But do not add a whole extra egg instead of just the yolk, because the extra white thins the custard and can make the filling rubbery. Since whites set firmer than yolks at the same temperature, the yolk-only addition keeps the texture creamy.
What pie plate works best for this recipe?
The source page specifies a plate at least 1 1/2 inches deep, because shallower plates cannot hold the full volume of filling. And a glass or ceramic plate conducts heat more evenly than metal, so the bottom crust crisps without burning.
For another Pioneer Woman pie that needs careful attention to the crust, the pioneer woman blackberry cobbler takes a completely different approach by pouring batter in first. But both recipes prove that how you handle the base determines whether the top shines or falls flat.